In this video, I will show you how to use Bicep to deploy a Kubernetes cluster with custom network settings using the Azure CNI.
Azure CNI allows pods to be assigned IP addresses from Azure VNets which allows them to communicate with Azure resources directly through peered networks.
I use Neovim and the Azure CLI for my coding and deployment.
You will learn how to:
- Implement dev/test prefix to create multiple clusters with the same template
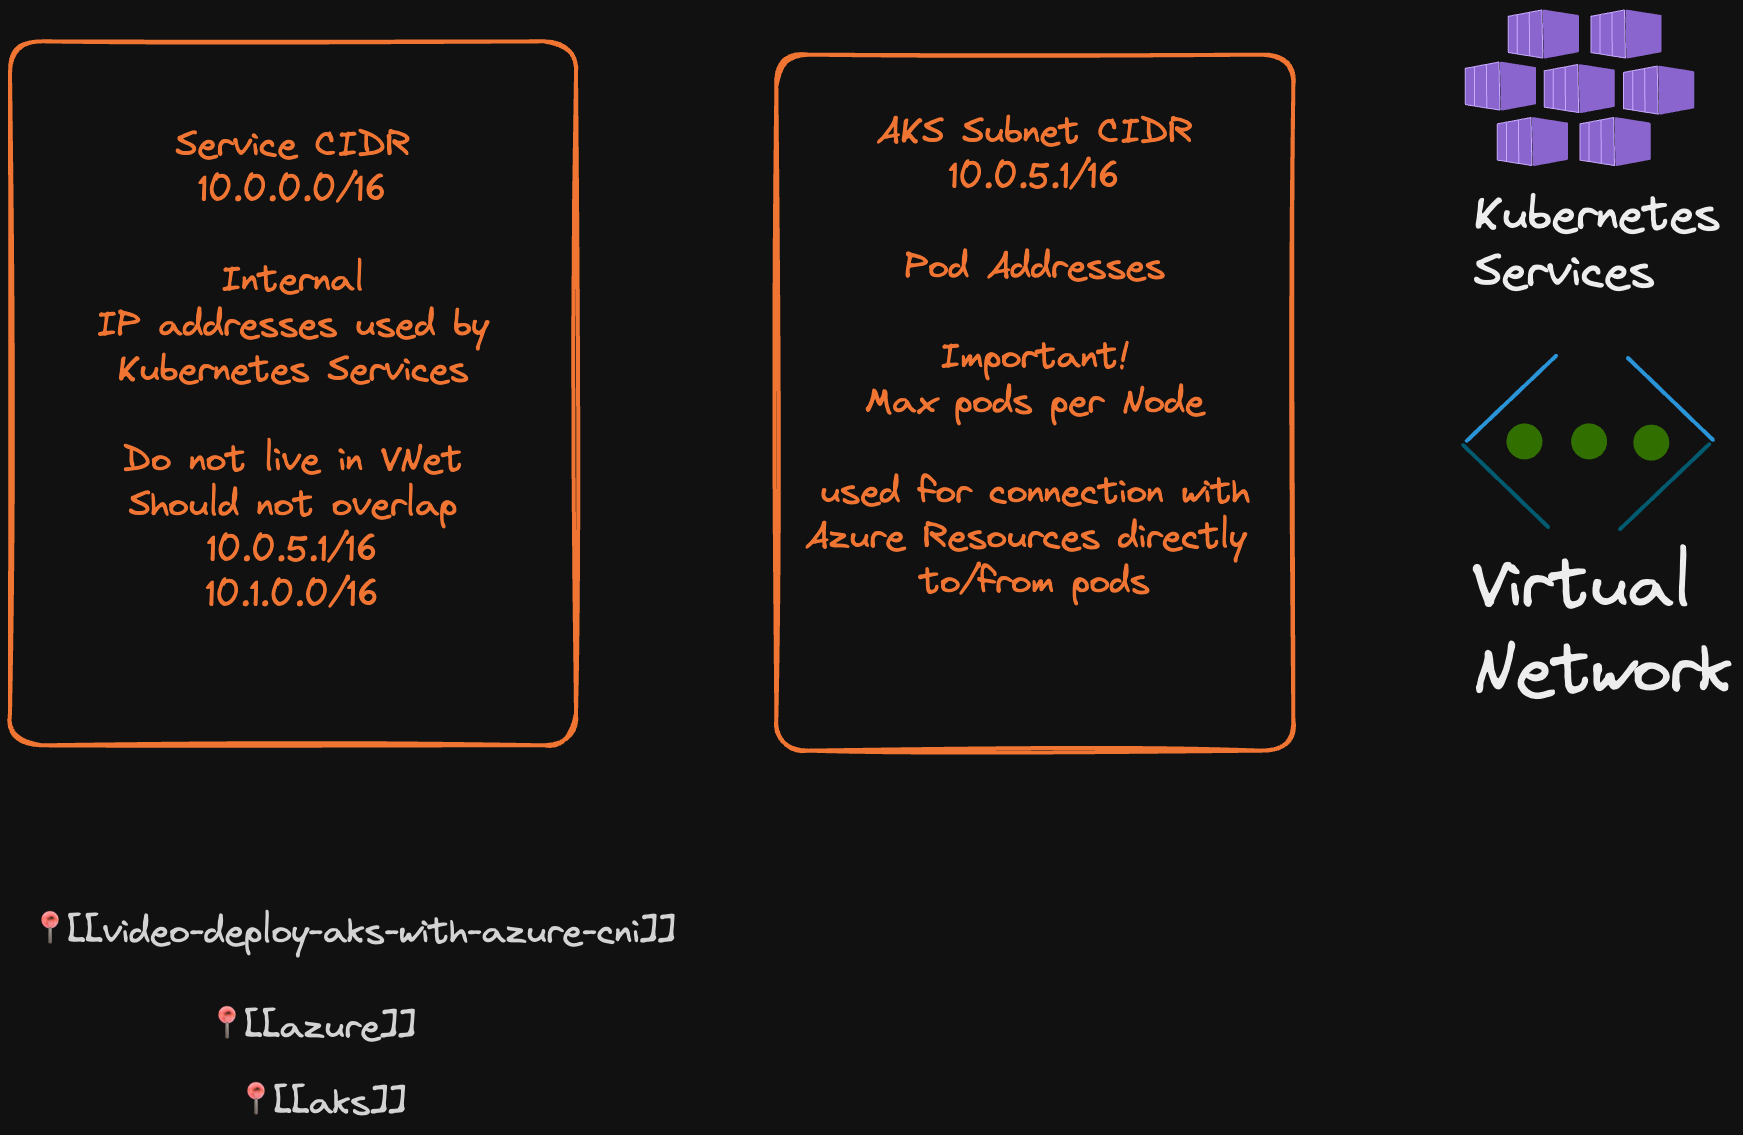
- Plan a VNet range for an Azure CNI cluster and be mindful of overlaps
- Deploy a VNet and subnet for the cluster using Bicep
- Deploy a cluster with Azure CNI enabled and configure the maximum number of pods per node
- Validate your Bicep template and troubleshoot errors
- Explore the results of your deployment in the Azure portal
- Understand the limitations of Azure CNI and why VNet peering is not supported in my configuration due to overlaps
This video is suitable for anyone who wants to learn more about Azure CNI and how to use it in their Kubernetes deployments.
Excalidraw
Bullet Points
- Introduction to Azure CNI
- Implement dev/test prefix
- Deploy VNET and one subnet for the cluster
- Deploy cluster with Azure CNI enabled
VNet planning
VNet cidr: 10.108.0.0/16
Subnet cidr:
10.108.0.0/16 - 65,536 addresses
Service cidr 10.0.0.0/16 DNS service ip addres 10.0.0.10
Links:
202307071807
https://learn.microsoft.com/en-us/azure/aks/configure-azure-cni